The ideal IoT development board for Lectures
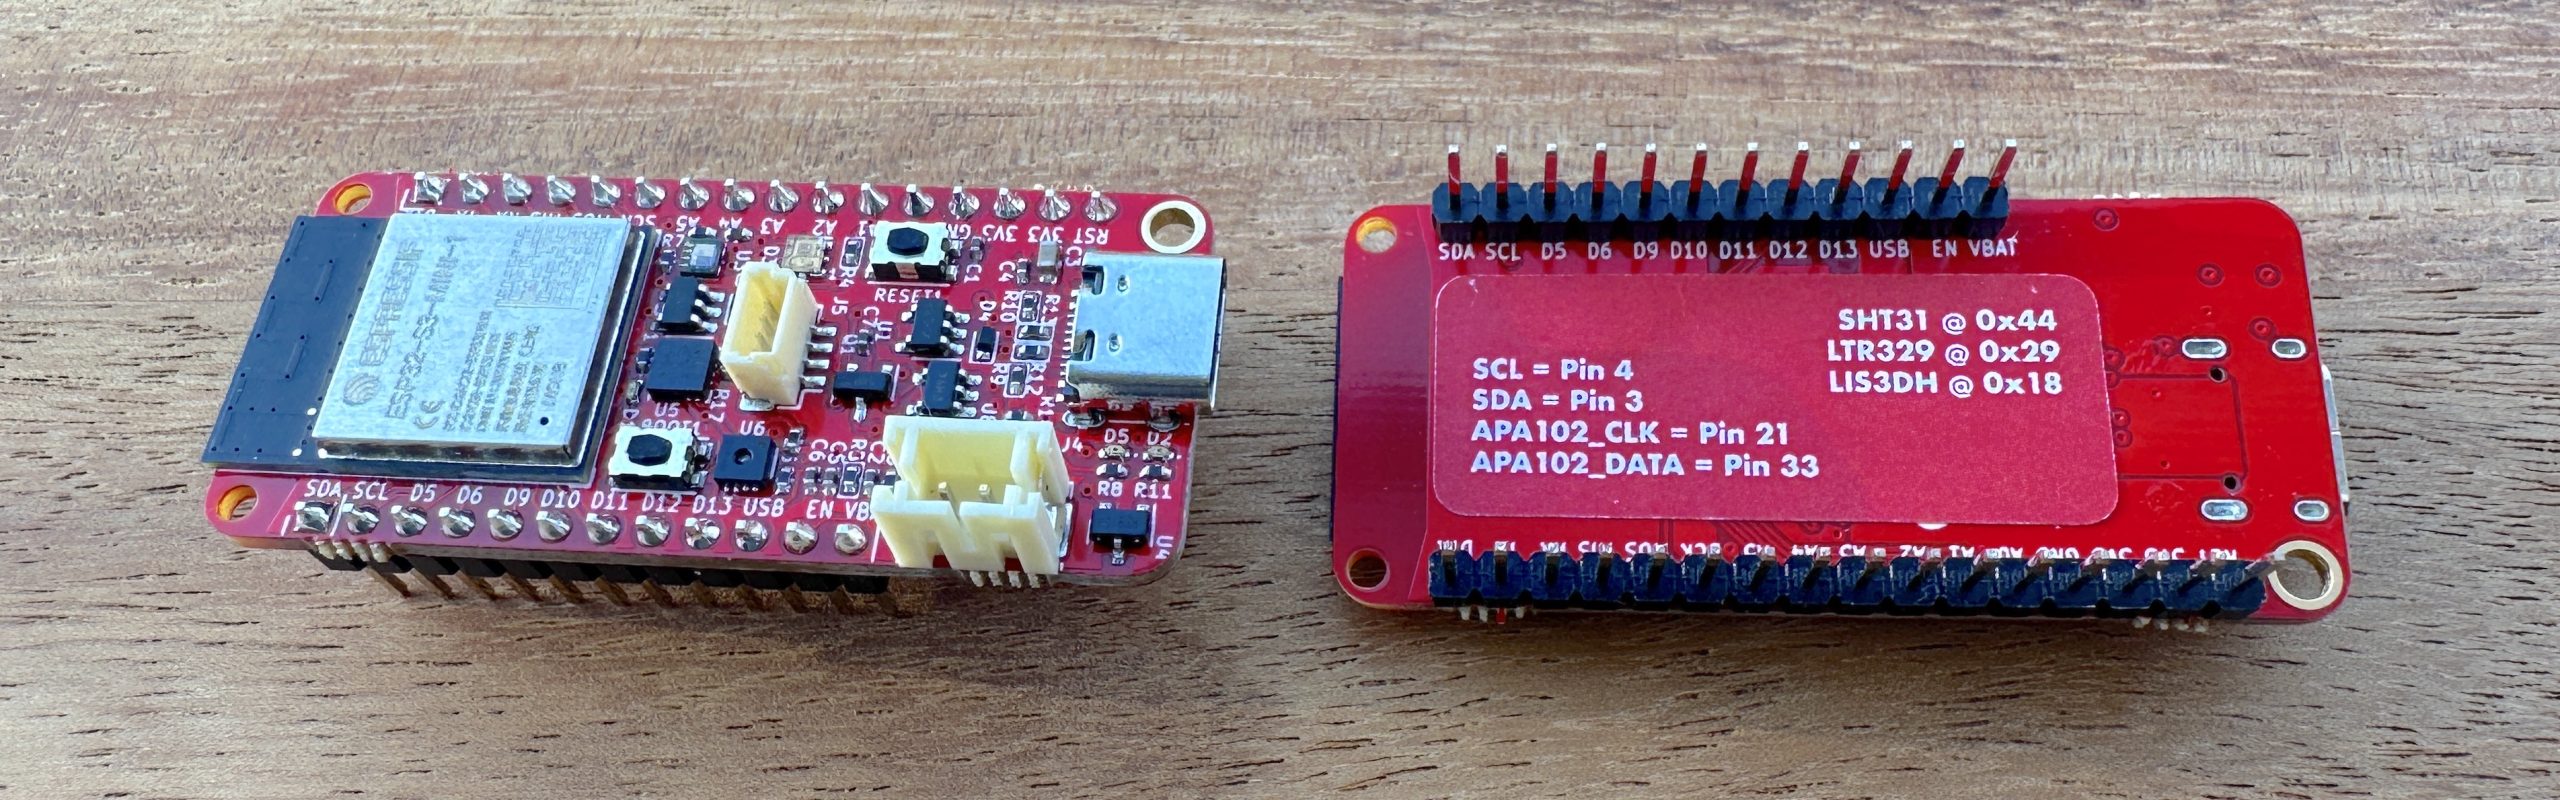
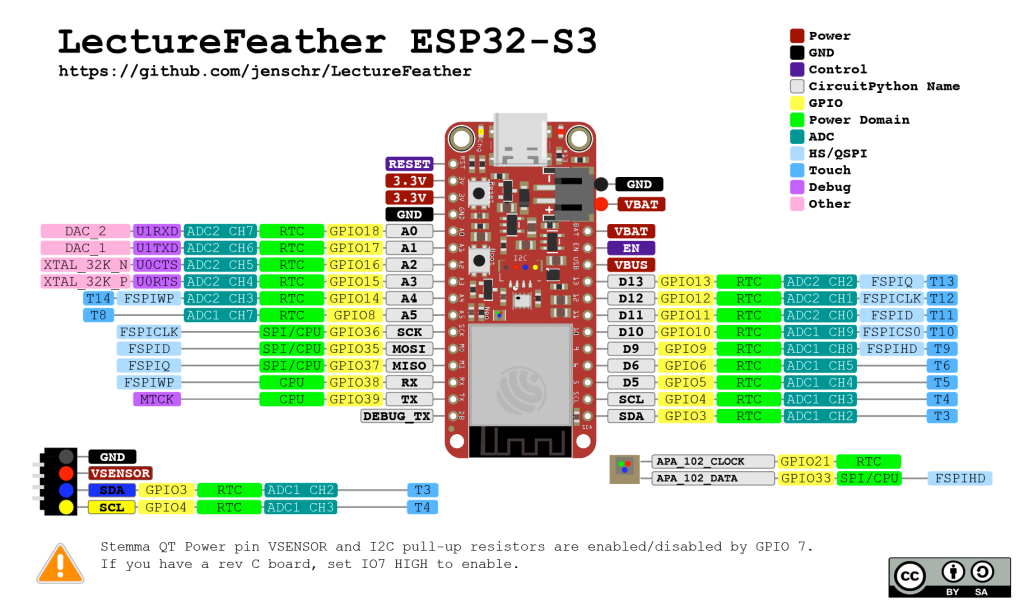
LectureFeather was designed to be the perfect solution for lecturing IoT topics at schools and universities. It is also ideal if you just want a compact development board with useful sensor built in. The board is based on an ESP32 S3 with 8Mb Flash memory. It has LiPo battery charging built in and a DotStar RGB LED. It has a LIS3DH accelerometer, SHT31 for temperature and air moisture measurements, a MT8691AT hall sensor as well as a LTR329 light sensor that can detect visible and infrared light.
Jump to
The tiny device literally has everything you could want right out of the box, but it also comes with a STEMMA/QWIIK expansion board, that makes it easy to add topic-specific sensors, input- and output-devices, actuators and much more from brands such as Adafruit and Sparkfun. The design is fully Open Source Hardware and all details (including the Kicad source files) can be found on GitHub.
Specifications
The device follows the Feather form factor, so it fits right into any standard breadboard.
- ESP32 S3 with 8Mb Flash and no psram
- LIS3DH accelerometer
- SHT31 temperature and air moisture sensor
- LTR329 light sensor
- MT8691AT hall sensor
Lectures and code examples
The device was originally created to be used with the topic Edge to App, lectured at Kristiania University and all code from the lectures are available on Github. The examples are made to used with VS Code and the PlatformIO extension.
- The First lecture covers basic use of the device and sensors
- The Second lecture has examples for getting the device online
- The Third lecture shows sending data to MQTT brokers
- The Fourth lecture shows how to use services such as Blynk to show two-way app control
- The Fifth lecture shows how to send Push messages on iOS and Android using the PushSafer service
The remaining lectures shows how to build a Node.js backend that can deliver data to a React frontend. The code is MIT licensed, so feel free to use in your own topics. The lectures are not available since they are the property of Kristiania University.
With no soldering required or extra sensors to install, you can just hand it out to the students along with a suitable USB Type C cable and they’re ready to learn. Developing this board required quite a bit of tinkering and many years of experience have been poured into making this a solution that will not depend too much on dedicated solutions that can suddenly cost thousands without warning. I’ve formerly based my lectures around integrated solutions such as Particle, but these days I find that basing IoT devices for lectures is better when allowing the students to select their own backend & cloud solutions.
Pinout & connections
- I2C is on pins IO03 and IO04. Initiate I2C using wire.begin(3,4);
- You can turn on/off the power supply for the I2C devices using IO07. Set this low before going into low power mode.
- The device also has a LED_BUILTIN on IO13 for maximum compatibility with Arduino sketches.
Purchasing
The device can be purchased directly from Maketronics in Oslo, Norway. Single boards are sold for $54.50, but volume pricing is available:
- 10 units @ 10%
- 25 units @ 15%
- +50 units @ let’s discuss
Use the form below to request an offer, including shipping. If you accept the offer, we will send an invoice payable via either Paypal (add 3.5%) or Bank Transfer with IBAN.