Using a radar sensor with BrightSign video players
Want your Brightsign video player to only play when someone is in front of it? Or maybe you want to show a silent slideshow to attract attention and then automatically switch to a video source when someone stands close? With the RadSense 1 radar sensor, this is as simple as connecting two wires and adding interactivity in BrightAuthor. This tutorial will show you how to do it. The pictures in the tutorial is from a Mac, but they’re very similar on a Windows computer.
Connections
The BrightSign players can be controlled using the GPIO port. You can buy a premade card with buttons or you can make your own buttons. The main thing is that the button should connect the GND pin of the BrightSign player to one of the GPIO inputs. In our case, we want to use the RadSense 1 sensor as the button, so it triggers whenever anyone stand or walk in front of the sensor.
To make the connections, you’ll need two thin wires and the GPIO connector plug. In this example we’re using a Black and Red wires for clarity.
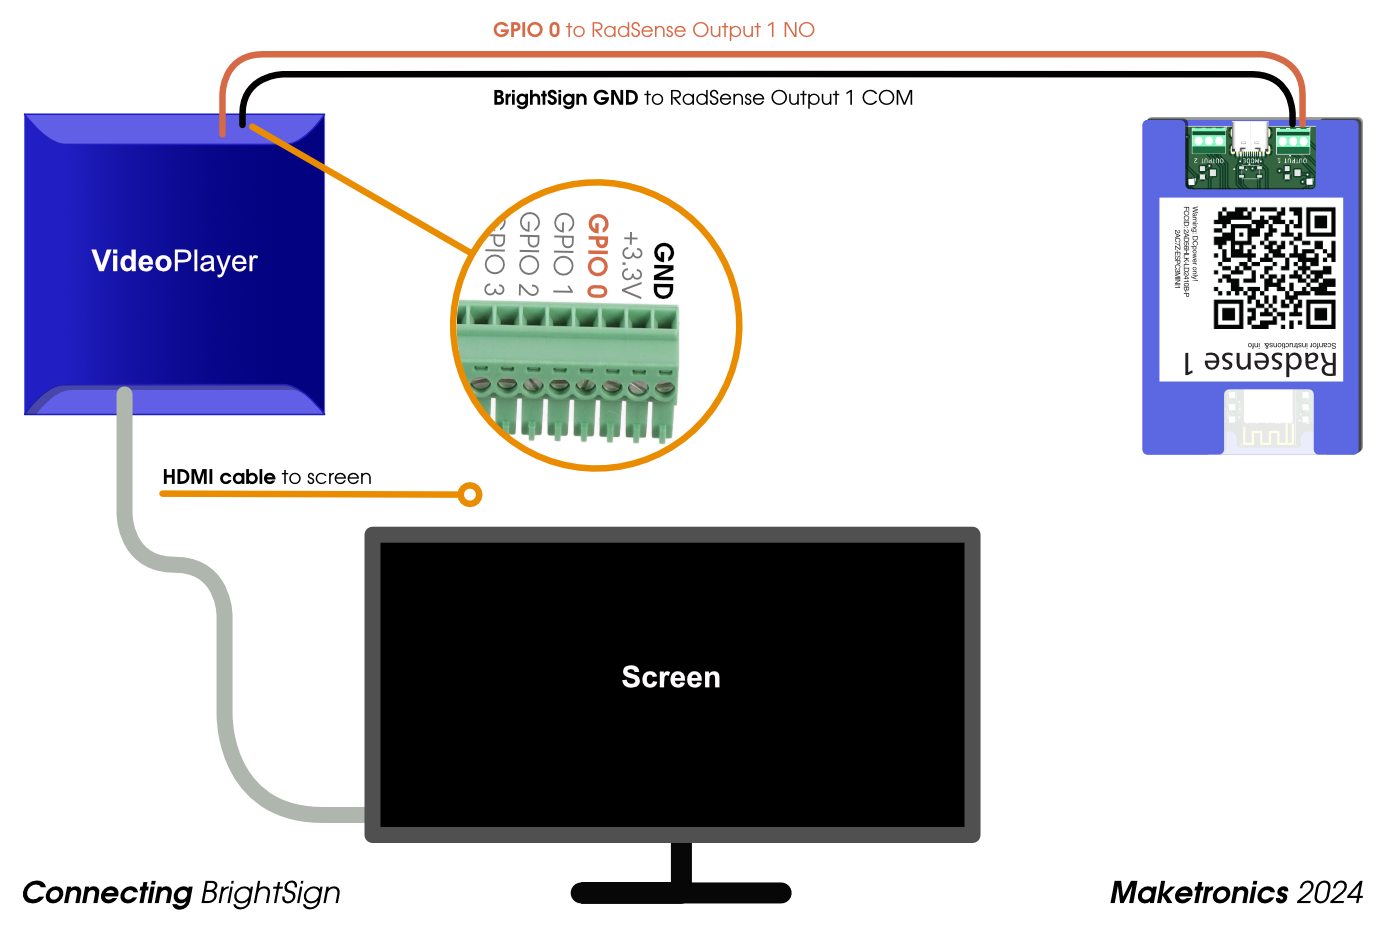
Connect the Black wire to the first pin of the Brightsign connector (the leftmost when you hold the plug ready to plug the connector). Connect the Red wire to the third pin of the Brightsign connector. Be very careful to NOT connect the GND pin directly to 3.3V (pin 2) as this may damage your device.
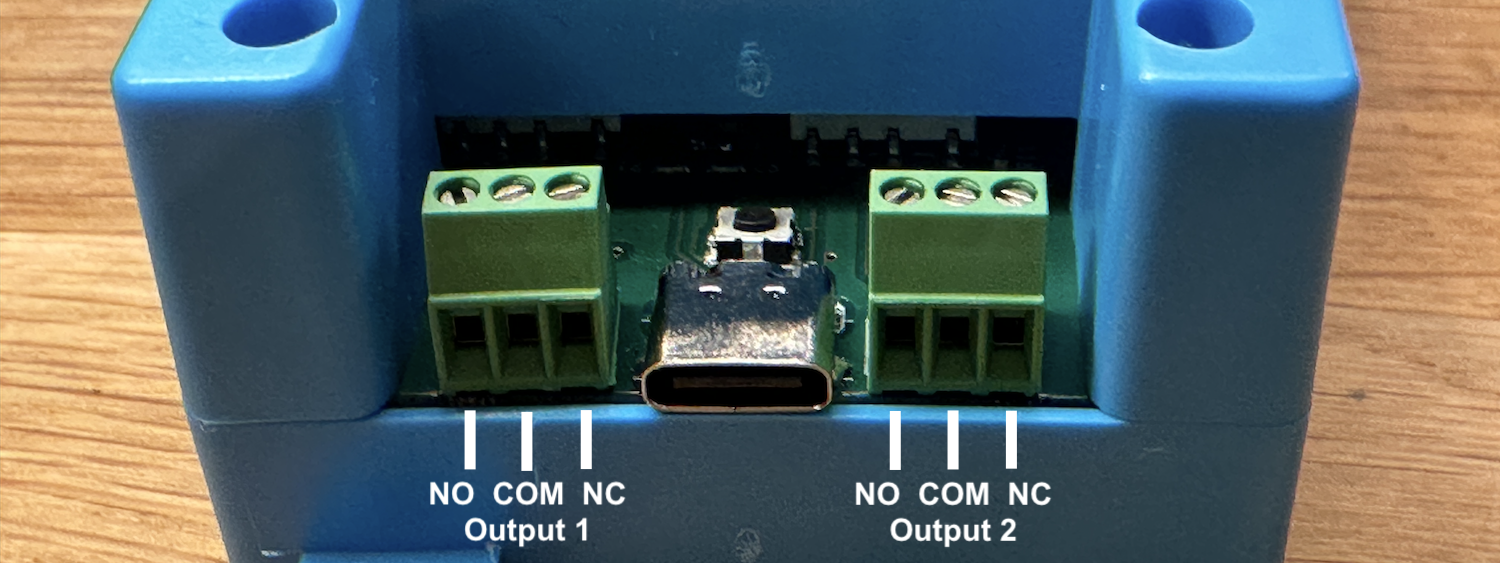
At the other end – connect the Black wire to the COM terminal of Output 1. Connect the Red wire to the Normally Open (NO) terminal. The Normally Open connector will close when anyone is within the detection range of the sensor. That’s all for connections.
Note: The BrightSign players have a pullup resistor on all the GPIO pins. This resistor pulls the signal up to 3.3V. When the signal is connected to GND, this is a trigger that you can use in the authoring tool. Be adviced that you should always connect to GND on the Brightsign player and not any other device such as an Arduino. For that you would need to connect all DC grounds.
Setting up the project in BrightAuthor:connected
If you are reading this tutorial, you likely have the software, but if not – click here to download it. We also need some video’s, so in this case we’ll use some Creative Commons licensed examples by Engin Akyurt from the website pexels.com.
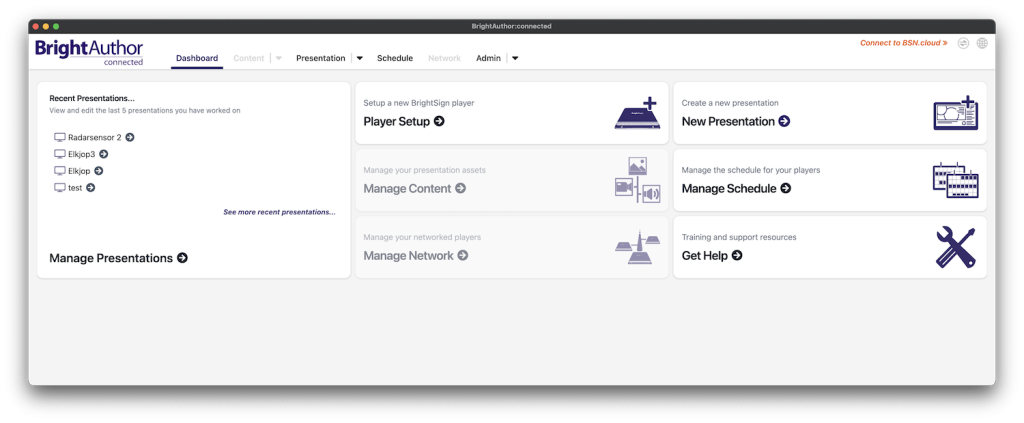
Click the “New Presentation” button.
Next, you’ll need to setup your project. Make up a name, select a folder and select your BrightSign player.
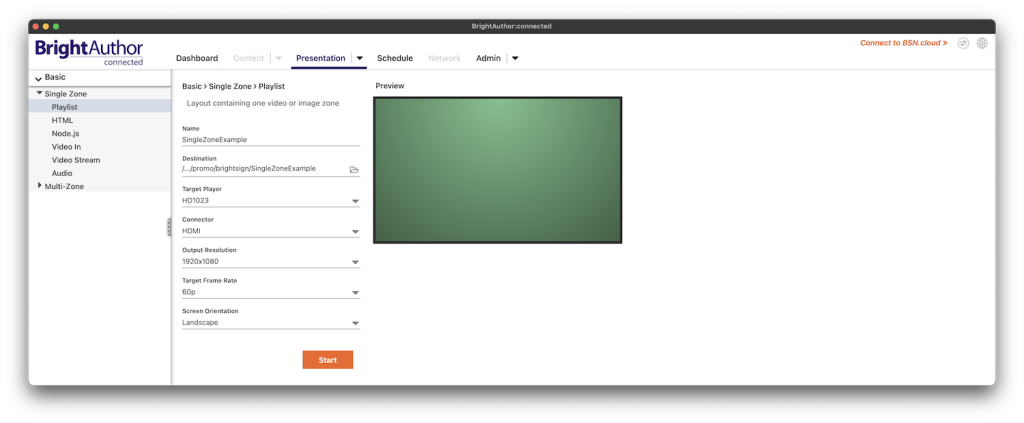
Clicking the Start-button will take you to this screen. We won’t be needing that for now, so just click the “Content” tab (marked with orange #1)
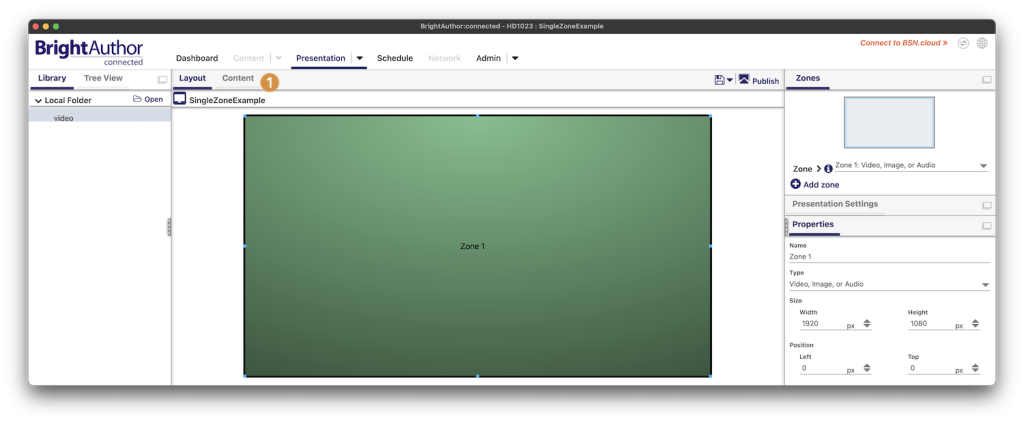
Once in the “Content”-tab, you’ll need to select the folder where you have your video files.
Click the “Open” button under the “Local Folder” panel (1). Browse to the folder where you have your video files on your hard drive (2). We suggest you use the same folder for all your files. Once you’ve clicked Select, nothing will change/update until you click the Reload button (3)
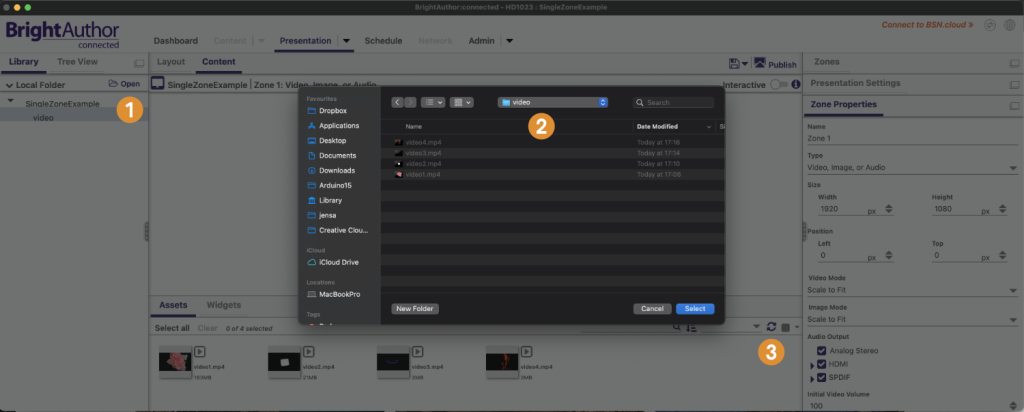
Next we’ll need to add the video files
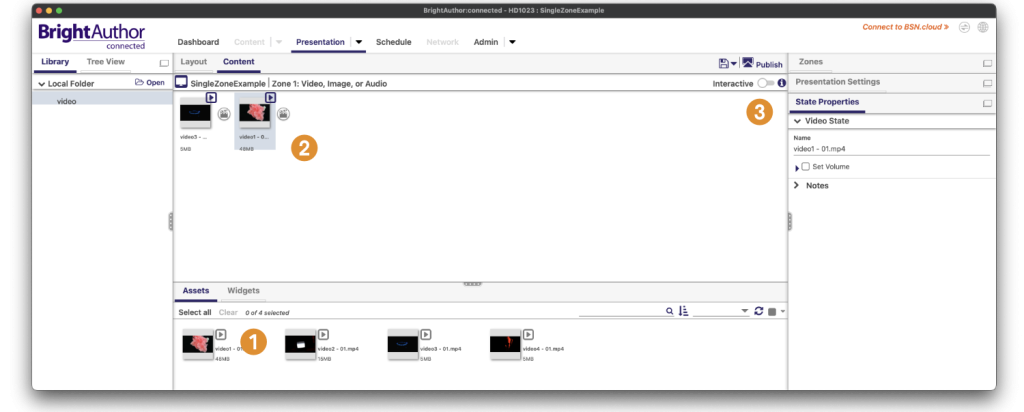
Drag the required video files from the lower “Assets” panel (1), into the “Content” panel (2). Once you have added the files you’ll need, click the “Interactive” slider (3).
Building interactivity
When you’ve entered Interactive mode, the Content panel will look something like this. Under each of the video’s there is a movie-icon. We don’t need these, so click the icon (1) and press the Delete button to remove it.
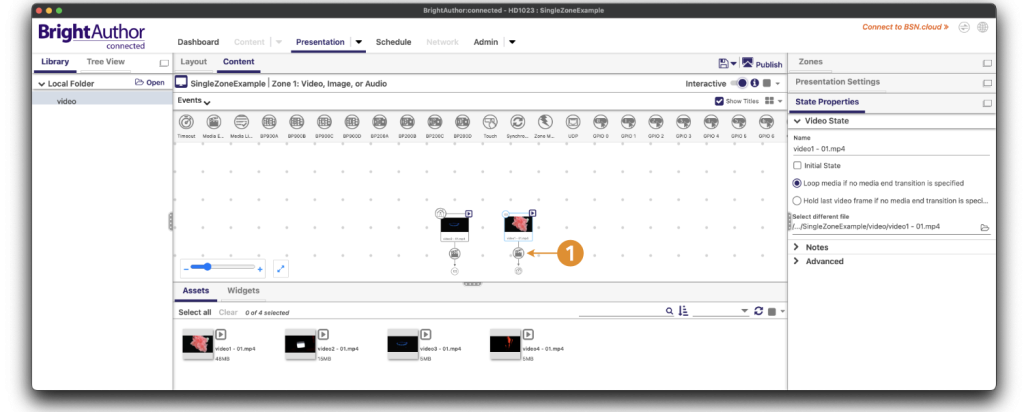
When the Movie-icon is gone, it’s time to add interactivity via the GPIO inputs.
Click the button named “GPIO 0”. It should be highlighted in a light, blue color as below. Next – hover above the file name on the movie tile (2). It highlights to indicate that it’s interactive. When you click this area, the GPIO connector is shown as below.
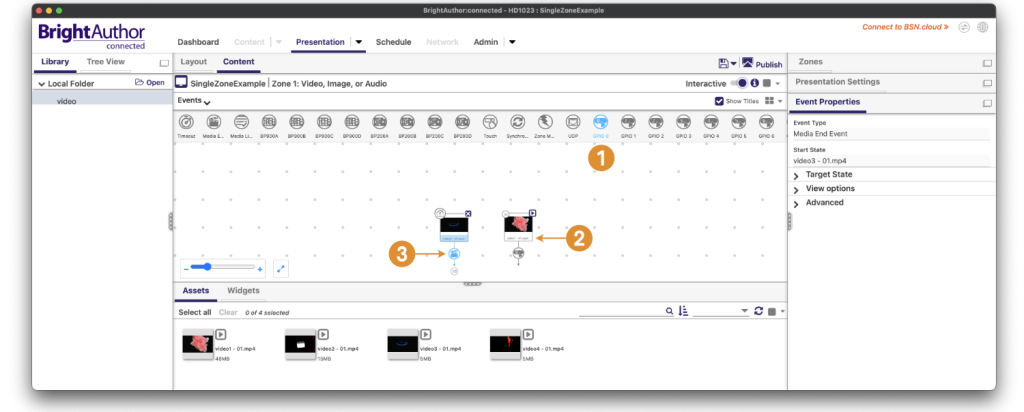
Next, remove the Movie-icon underneath the other video as well (3) and repeat so that you now have “GPIO 0” under each of the icons. Now it’s time to make this interactive!
Click the “GPIO 0” icon underneath the first movie (1). On one of the video’s select that it should trigger on “Down” (2) and select that the Transition to new state should point to the other video (3). Repeat for the other video, but set this one to trigger on “Up” and to transition to the other video as below.
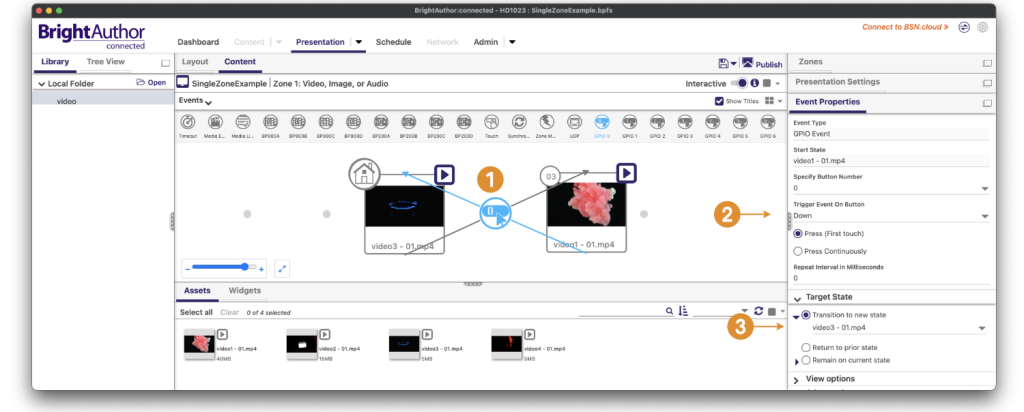
That’s it. You’ll see the the GPIO 0 icons will now be on top of each other, but you can still select them by clicking the lines crossing. Now is a good time to save the poject if you have not done so yet.
Finally it’s time to publish it to an SD card. Click the Publish button (1).
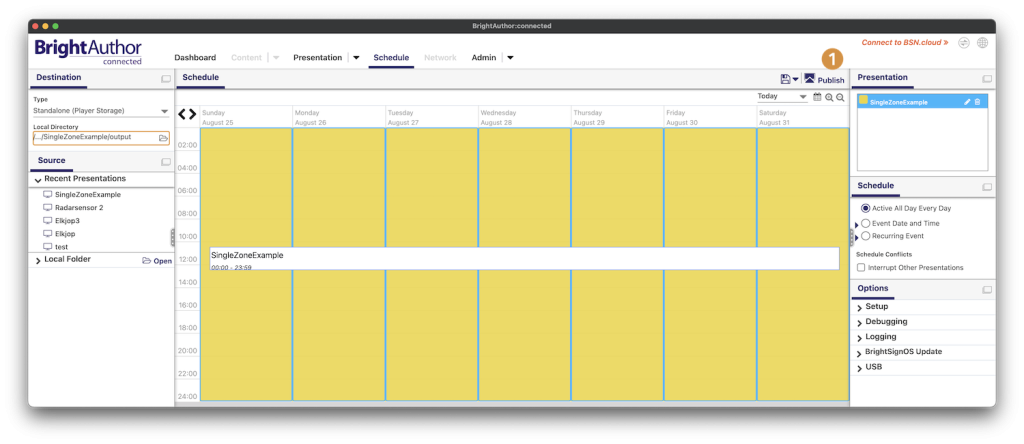
Set the output directory in the Destination-panel to the left. Unless you want the project to shutdown at specific times, you can then just click the “Publish”-button to export the files. Be sure to copy the video files to the output folder if you didn’t use the same folder for everything.
Then it’s time to copy the files. Below is a screenshot of the files on my SD card.
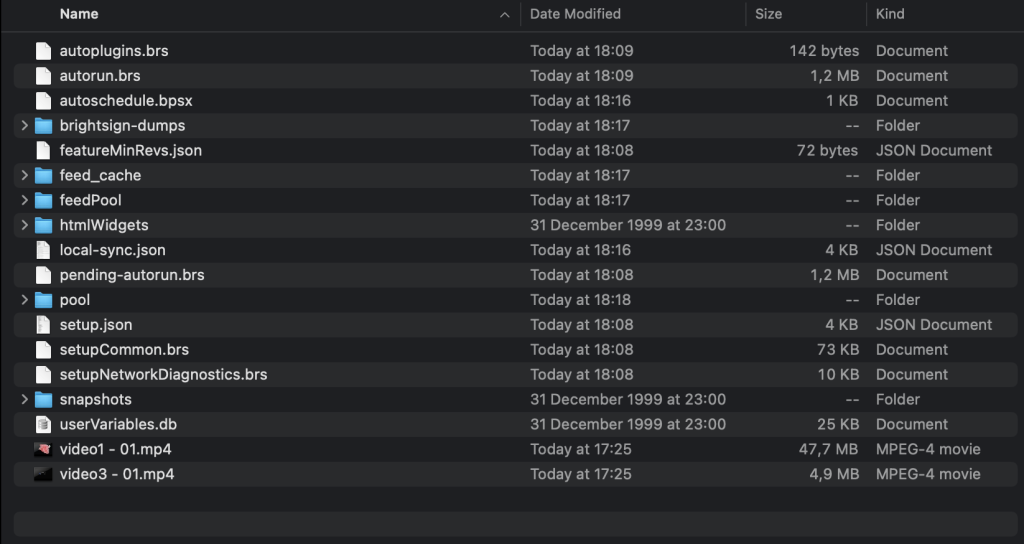
Eject the memory card safely, insert it into the BrightSign player, connect the player to the screen with a HDMI cable and power the player up. If all goes well, you’ll see the video playing and if you connected it correctly, you can see the video playing. When you trigger the RadSense 1 sensor, the video will change over to the other video.
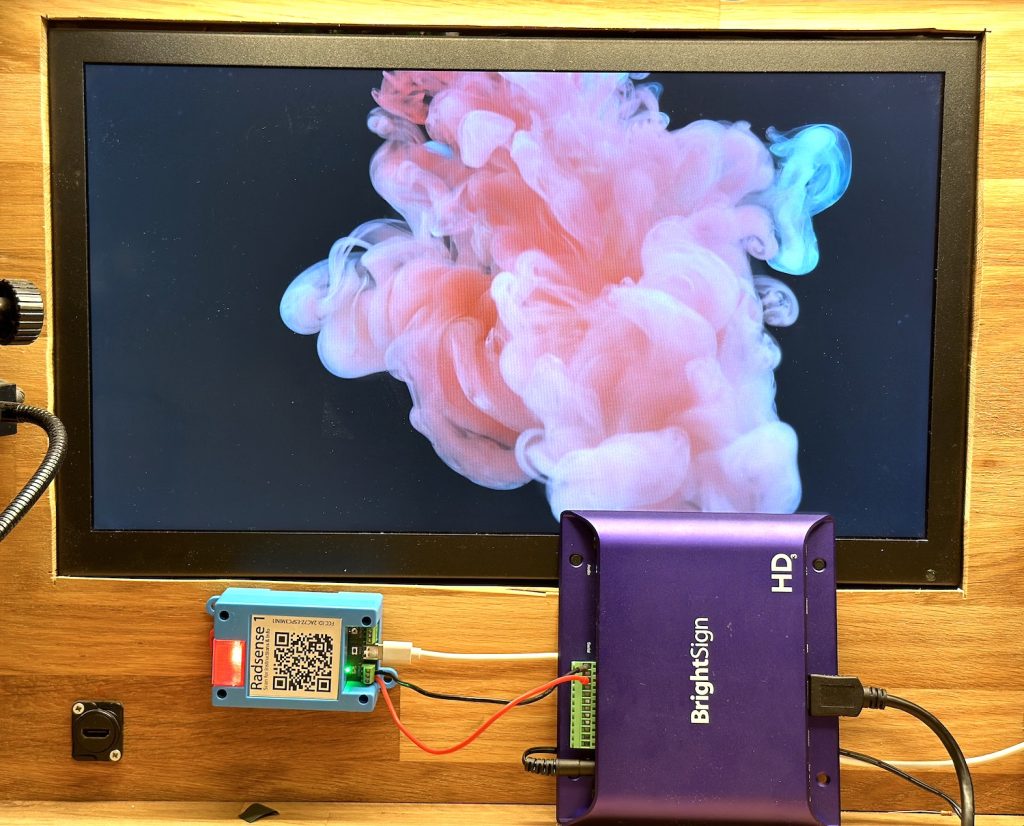
Here you can see the RadSense 1 connected to a BrightSign HD1023 that is then connected to a video monitor. Don’t forget that the RadSense and video player is typically be mounted behind the wall. The radar sensor has no problem seeing through a 1″ (2.5cm) thick wooden panel as in this example. Thinner materials provide more precise detection, but the only thing that really blocks this millimeter radar sensor is metal. This offers great flexibility in where and how you mount it. Read more about the RadSense millimeter sensor here.
Common problems
It is normal that it takes a while for the BrightSign player to start. The more recent players are faster and especially if you use a fast SD card. This olso applies to older players like the one we use here.
If you put the files on the SD card and insert the SD card, but the BrightSign player just shows the text “Please insert storage device for recovery” and then later “Attempting Network Recovery”, you’ve likely not copied all the files or you misconfigured the player. Make sure that you copied every file to the SD card – also the video files. Place the video files in the outer folder – along with all the other files as in the picture below.

If you cannot find a solution to your problem, we recommend asking questions at the BrightSign forums. Be sure to explain your setup and link back to this tutorial so anyone helping you will know what you are trying to achieve. Also – if there is anything you think we should add to this tutorial, feel free to send us a message.