How to make an Alarm with no programming
The RadSense sensor makes it really easy to make an alarm to protect you cookie jar, Halloween candy, christmas presents or something more important. Or maybe just a fun prank on a friend? Below are the parts you’ll need for this project. Some of these, you may have already if you have a parts bin or access to some basic electronics parts.
- The RadSense sensor
- USB Power supply for the RadSense 1
- 5-12V siren (like this, this or something similar)
- Toggle Switch
- Power adapter or battery for the siren
- Some wires
Test the alarm!
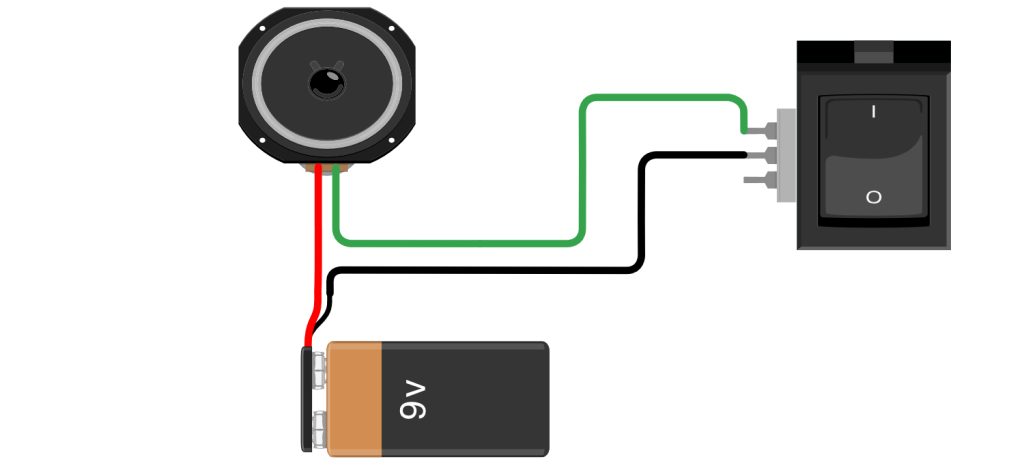
Start off by connecting the alarm up to the switch as in the image below.

We’ll later connect this to the radar sensor using the Red wire, so make that wire twice as long as the distance to where you want to mount the RadSense sensor. As you can see, this is a full circuit from Red to the positive (+) side of the Siren. The green cable goes from the negative connection on the Siren (gnd/-) to one of the connection points on the switch. If you have a switch with two connection points (like this one), you can connect to either of these. If you have a three connection alternating switch like in the picture above (or this one), connect the green wire to the outer connection point that is closest to the “on” position.
Finally, connect the black wire from the switch (use the middle connection for a 3 connection switch) to the negative pole on the battery. Adjust the length of the wires, so you have the length to mount the parts where you want. Pressing the switch should now trigger the alarm. If the alarm went off earlier in the process and you have a three-pole switch – try changing the side where the green wire connects.
Getting the Radar sensor ready
When you unpack the Radar sensor, it comes with a USB cable in the packaging, as well as a tiny screwdriver. Connect the USB cable to the RadSense and the other end to a USB charger (500mA minimum, so most phone chargers will work). You can also use a power bank for a temporary installation, but don’t expect many weeks of runtime with that method.
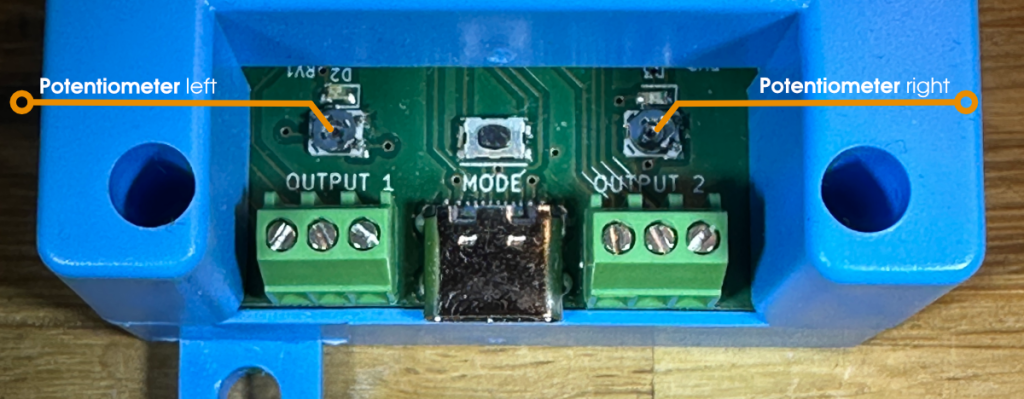
Place the sensor just above the object you want to protect. Once plugged in, the device will start up. The light will change color according to the detection state. The RadSense sensor can reliably detect a person at up to 3 meters (9 feet) distance. If that fits the area you want to cover, you’re good to go. Be aware that the sensor will detect through walls, so if you want to use a smaller detection zone – take out the tiny screwdriver that comes with the kit. Adjust the left potentiometer behind the screw terminal carefully halfway to the right. DO NOT use a lot of force as that may break the potentiometer!

You can now test by walking away and towards the sensor, using the LED feedback to see if the device triggers when you want it to. Make tiny adjustments with the screwdriver until you’re happy. For a more precise setup, check out the Bluetooth option in the Setup instructions.
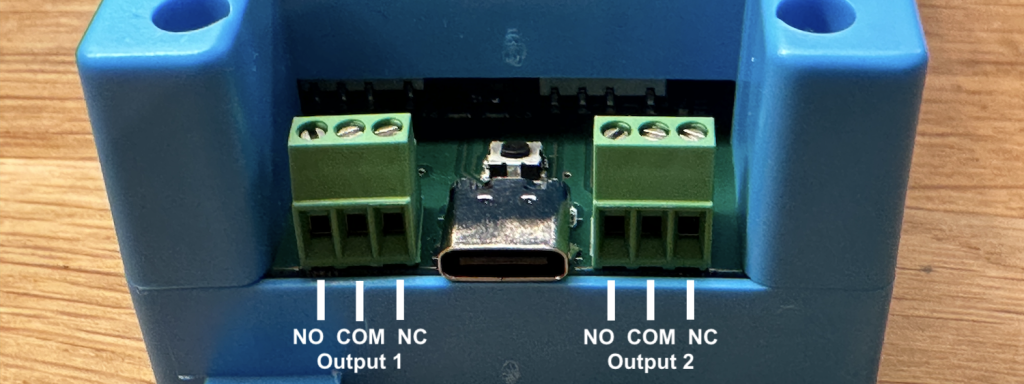
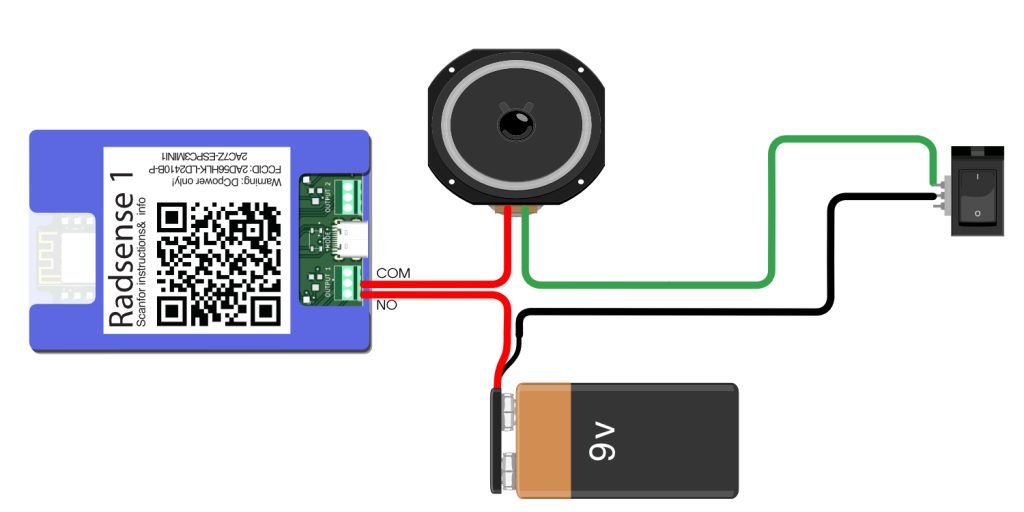
Then it’s time to connect the siren. Cut the red wire so you can stretch it to Output 1 on the RadSense device. Connect one of the ends to the COM terminal and the other to the NO terminal.

NO means Normally Open, so it will be closed when the sensor detects a person. At this point, the entire setup should look like this:

At this point, you should be able to use the Toggle switch to turn the alarm on and test it. This is one of the simplest and also quite noisy alarms you can make, but if you know some programming you can take this even further and silently send Push Notifications to your phone.