Want to scare your Halloween visitors as they walk up to the candy? Use the RadSense to turn off lights as the visitors get closer to the candy! No programming required!
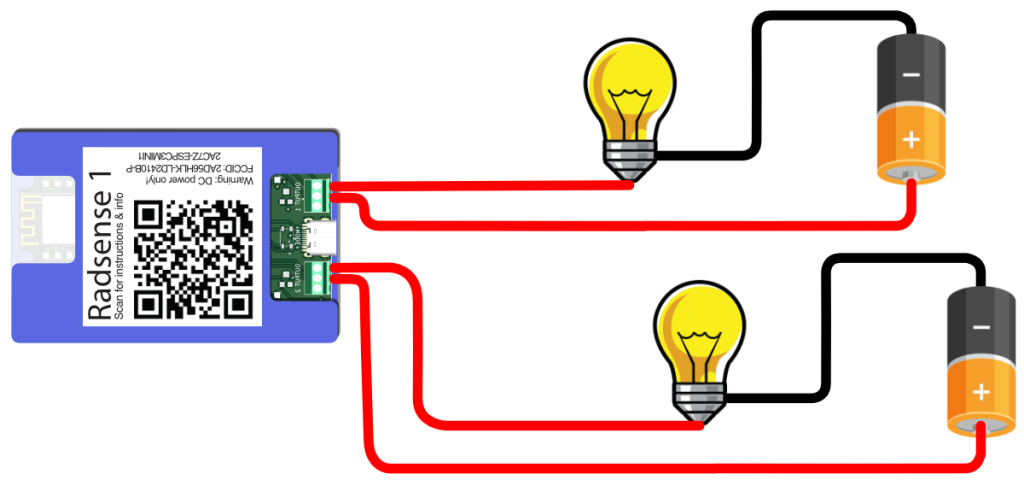
Set up a bowl of candy in your garage. Place the RadSense above the candy, pointing at the garage entrance. Connect a couple 12V DC powered lights (12W or lower) through the RadSense device like this:

Warning: do NOT use a light connected to AC power! Only use DC powered lights like these or similar driven from either battery or a DC adapter.
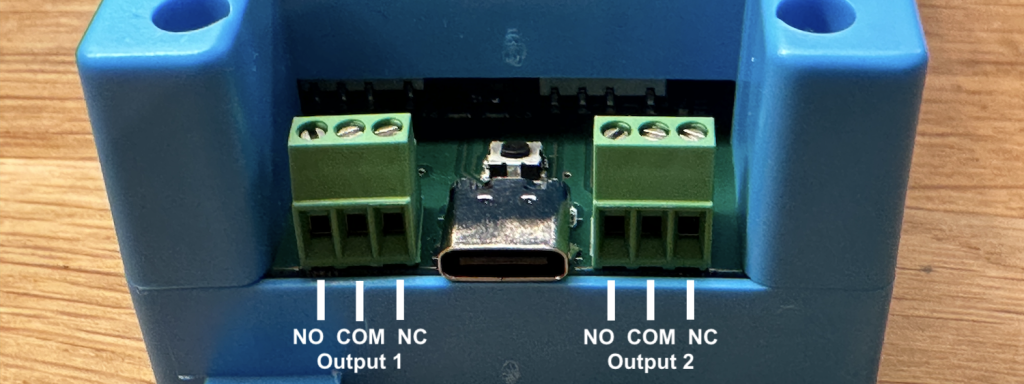
Simply cut one of the two wires going to the light, insert one end into the COM terminal and one into the NC terminal. The power will flow from the Common (COM) terminal to the Normally Connected (NC) terminal, completing the circuit. Once there sensor is triggered, the Normally Connected wire will be disconnected, so the light turns off when the sensor detects them.

If you are unsure about the connections, see our detailed guide for connecting the device.
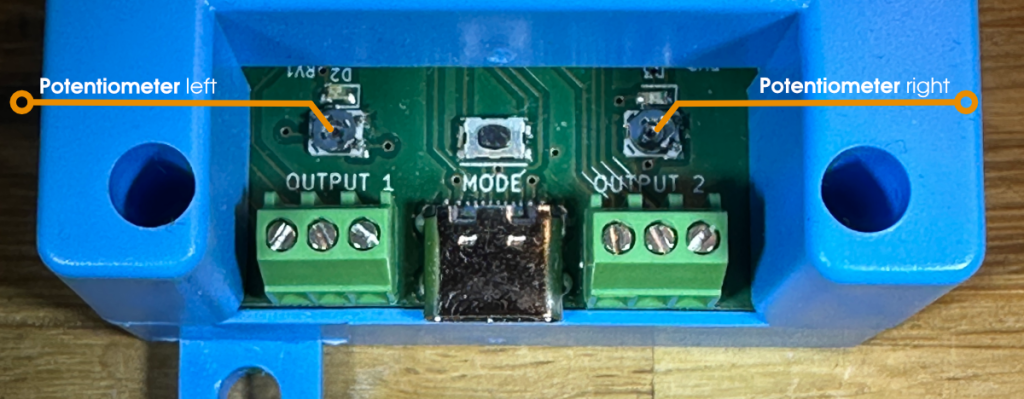
Next, tap the Settings button above the USB connector and wait to see the number of blinks and their color. Keep clicking the button until the device responds with a single green blink. This is the “Fast & Sticky” mode. It can sometimes lead to glitches and in this case, we might want just that to make it a little scarier!
Dividing into two zones (for two lights)
Now it’s time to “tune” the setup. In the wall of the box the device came in, there is a tiny complementary screwdriver. Use this to adjust the left potentiometer so it’s rotated halfway from left to right.

That should be about it! Now you can test and tweak your setup. If you need even higher precision for when each light should trigger, just use the Bluetooth Setup tool as explained here.
Want to make an even more fancy and scary setup? Throw video playback into the mix!
Happy Halloween!
